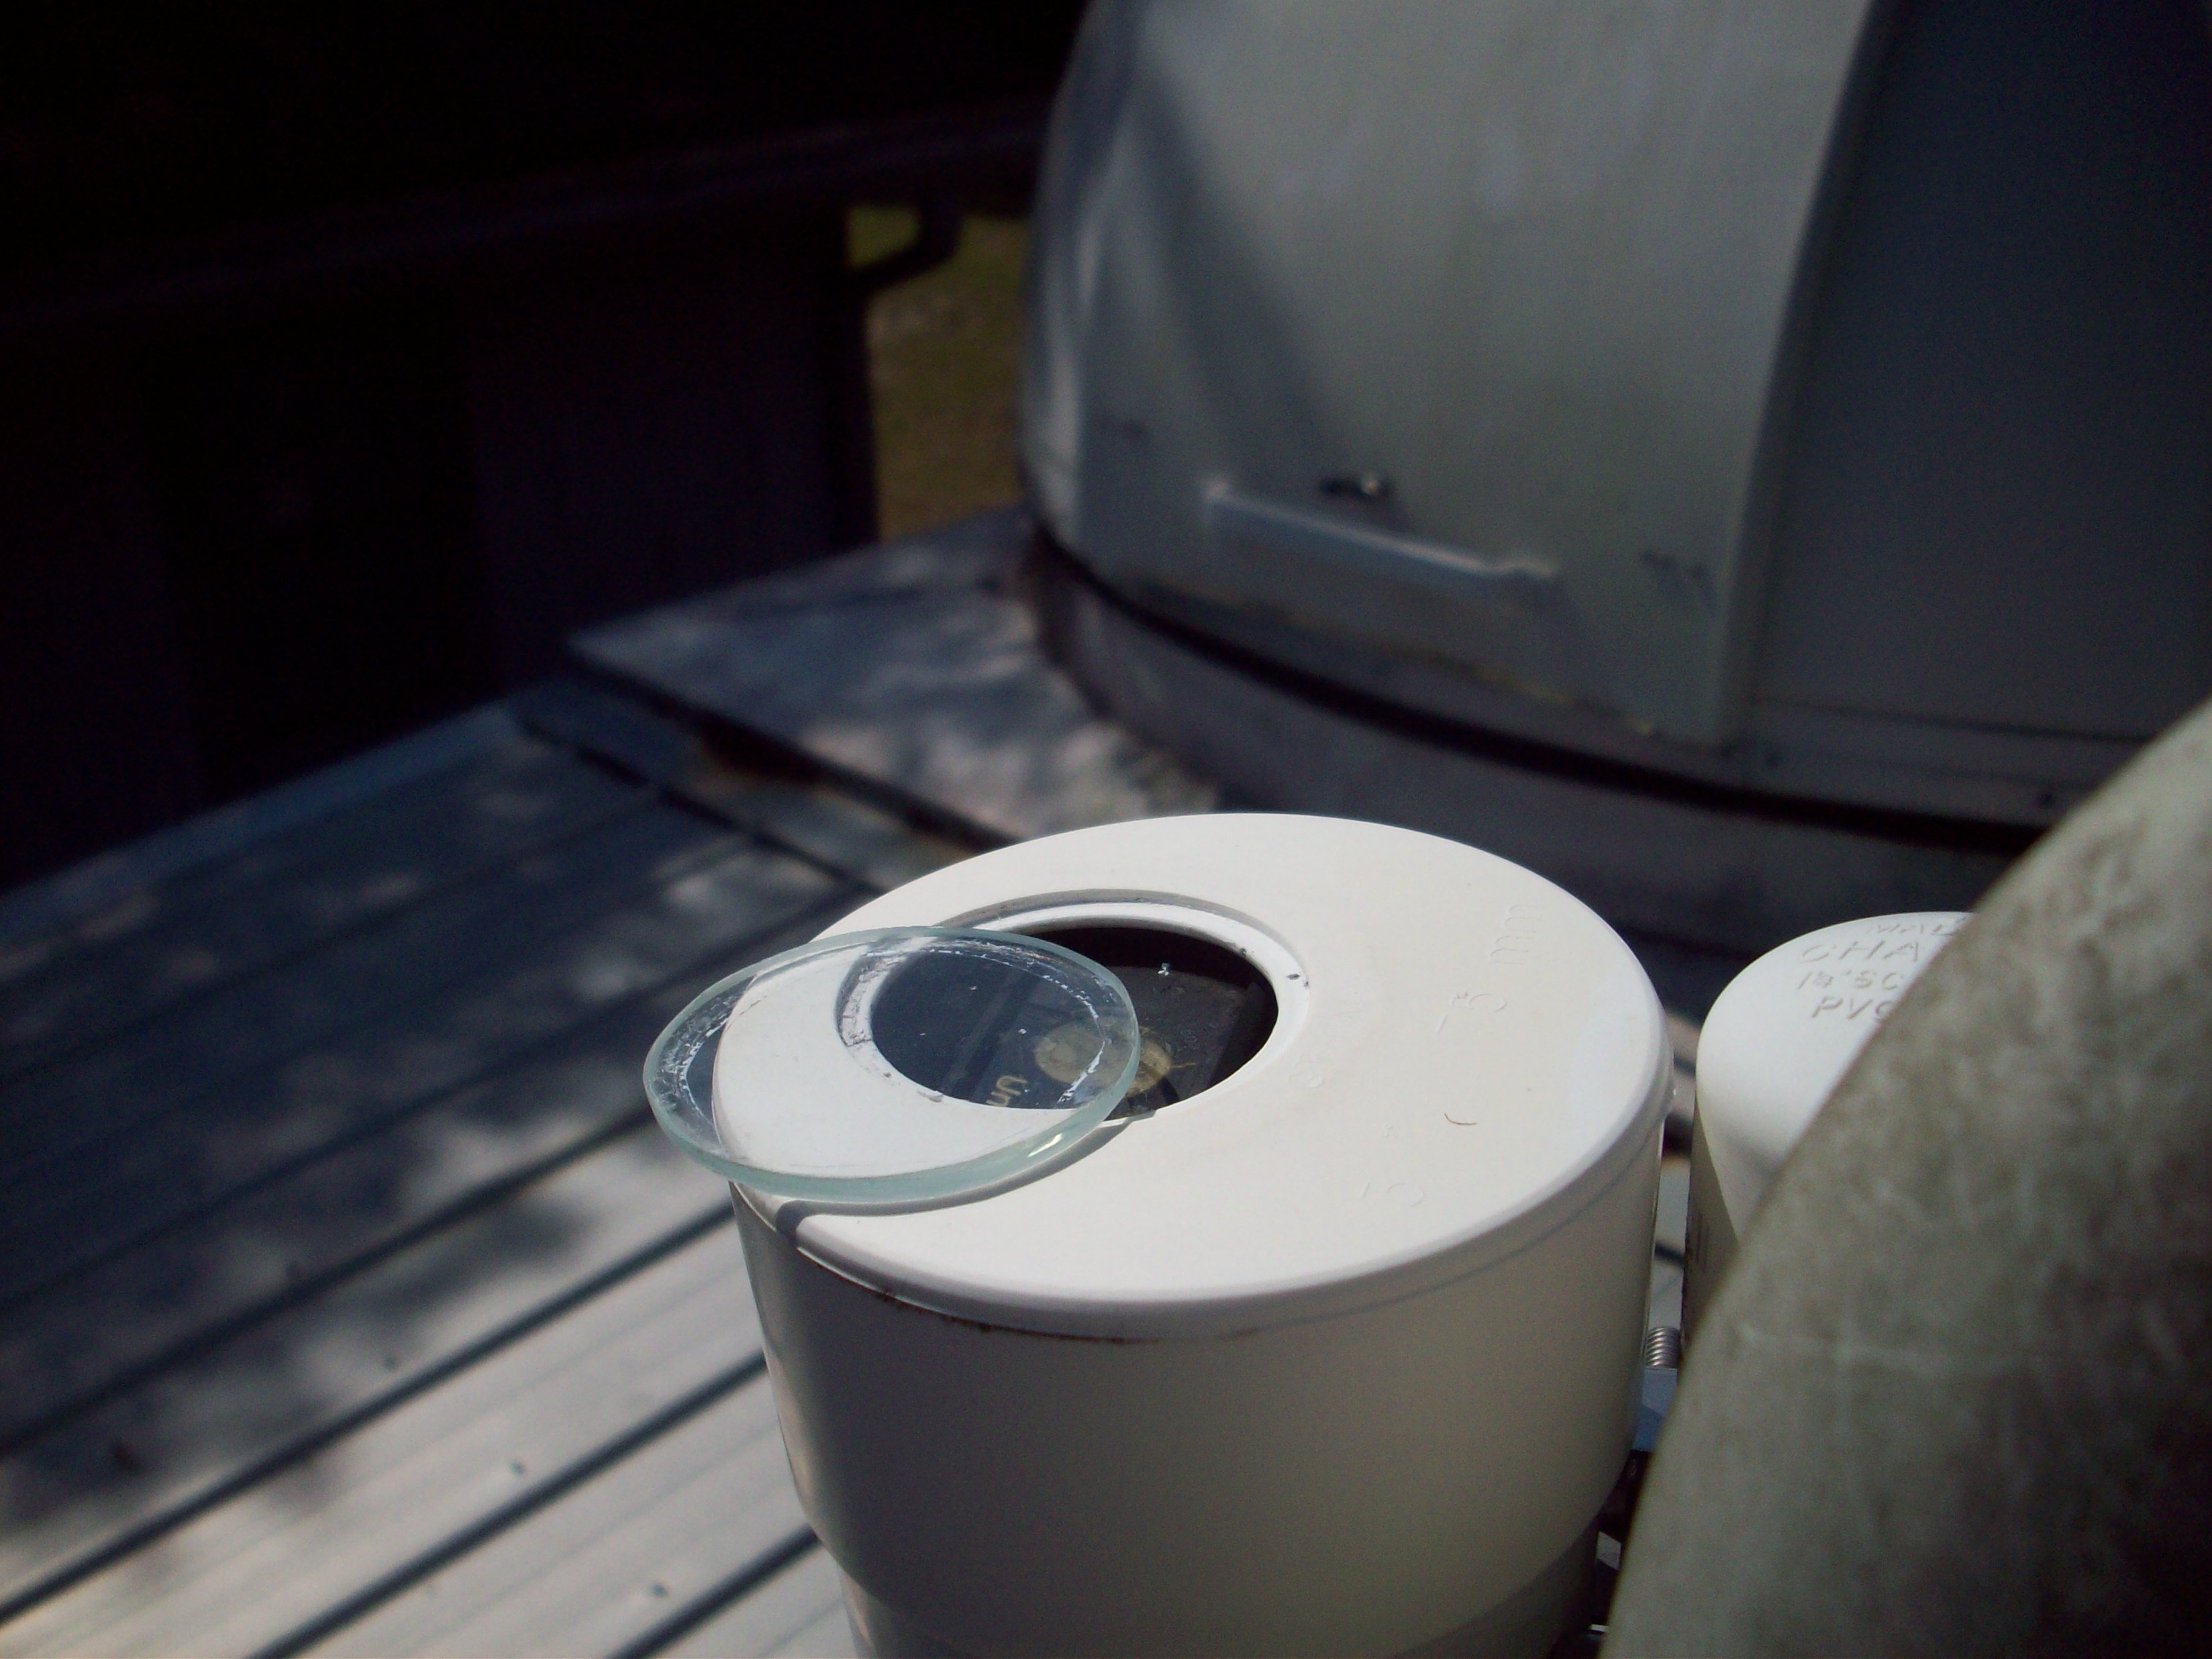
Repairs to the SQM housing and supporting communication equipment have been completed. The external housing cap and the failed POE (power over ethernet) component were replaced. I need to thank Unihedron for supplying a couple of the parts free of charge. They sent an entire replacement external housing cap with a new window already installed as well as a new glass window for the actual monitoring device. I broke the original plastic window while attempting to clean it.
Recently there have been enough dark-sky nights that I was finally able to re-calibrate the system. Re-calibration was necessary due to the housing and device window material being changed from plastic to glass.
So, the SQM charts on the Observatory->Sky Conditions page are once again active and providing accurate data on the brightness of the nighttime sky.
One of the more useful instruments on the PTO’s sensor tower is the Sky Quality Meter (SQM). The device constantly measures how bright the sky is. Clouds and other particulate matter in the atmosphere reflect light from surface features and ‘brighten’ the sky. To evaluate how much the sky brightness is effecting each image, an SQM reading of the sky’s magnitude is taken and included in the accompanying metadata. This information is used to evaluate the accuracy of image measurements. High altitude clouds may not be visible to the naked eye but may be dense enough to effect the measurement of a star’s brightness.
Recently, I noticed the device had stopped working. I glanced up at the sensor tower prior to getting out the ladder to get an idea how easy the SQM would be to get to. I noticed the glass window of the external housing was offset so far from its normal location that it was visible from the ground. Not good news.
Once I got up to the device is was apparent that the adhesive that sealed the window was totally missing. I am pretty sure it wasn’t eaten by anything so my guess is the Sun’s UV radiation slowly degraded the marine grade adhesive and then one of our avian visitors nudged the window out of the recess and over to the edge of the housing. This is not the first time the window was left free. Several years ago I just happened to notice the absence of the sealant but at that time the window was still sitting in the recess. The manufacturer suggested the marine grade sealant that I used. They now recommend J-B weld for plastics.
Inside the housing there was evidence of the rain from a few days earlier. Testing showed the device still worked but the power over ethernet hardware was not working. So, right now the PTO awaits parts for the system to arrive from Canada. If you were wondering why the SQM trend chart has not changed since the 10th of June, this is the reason.
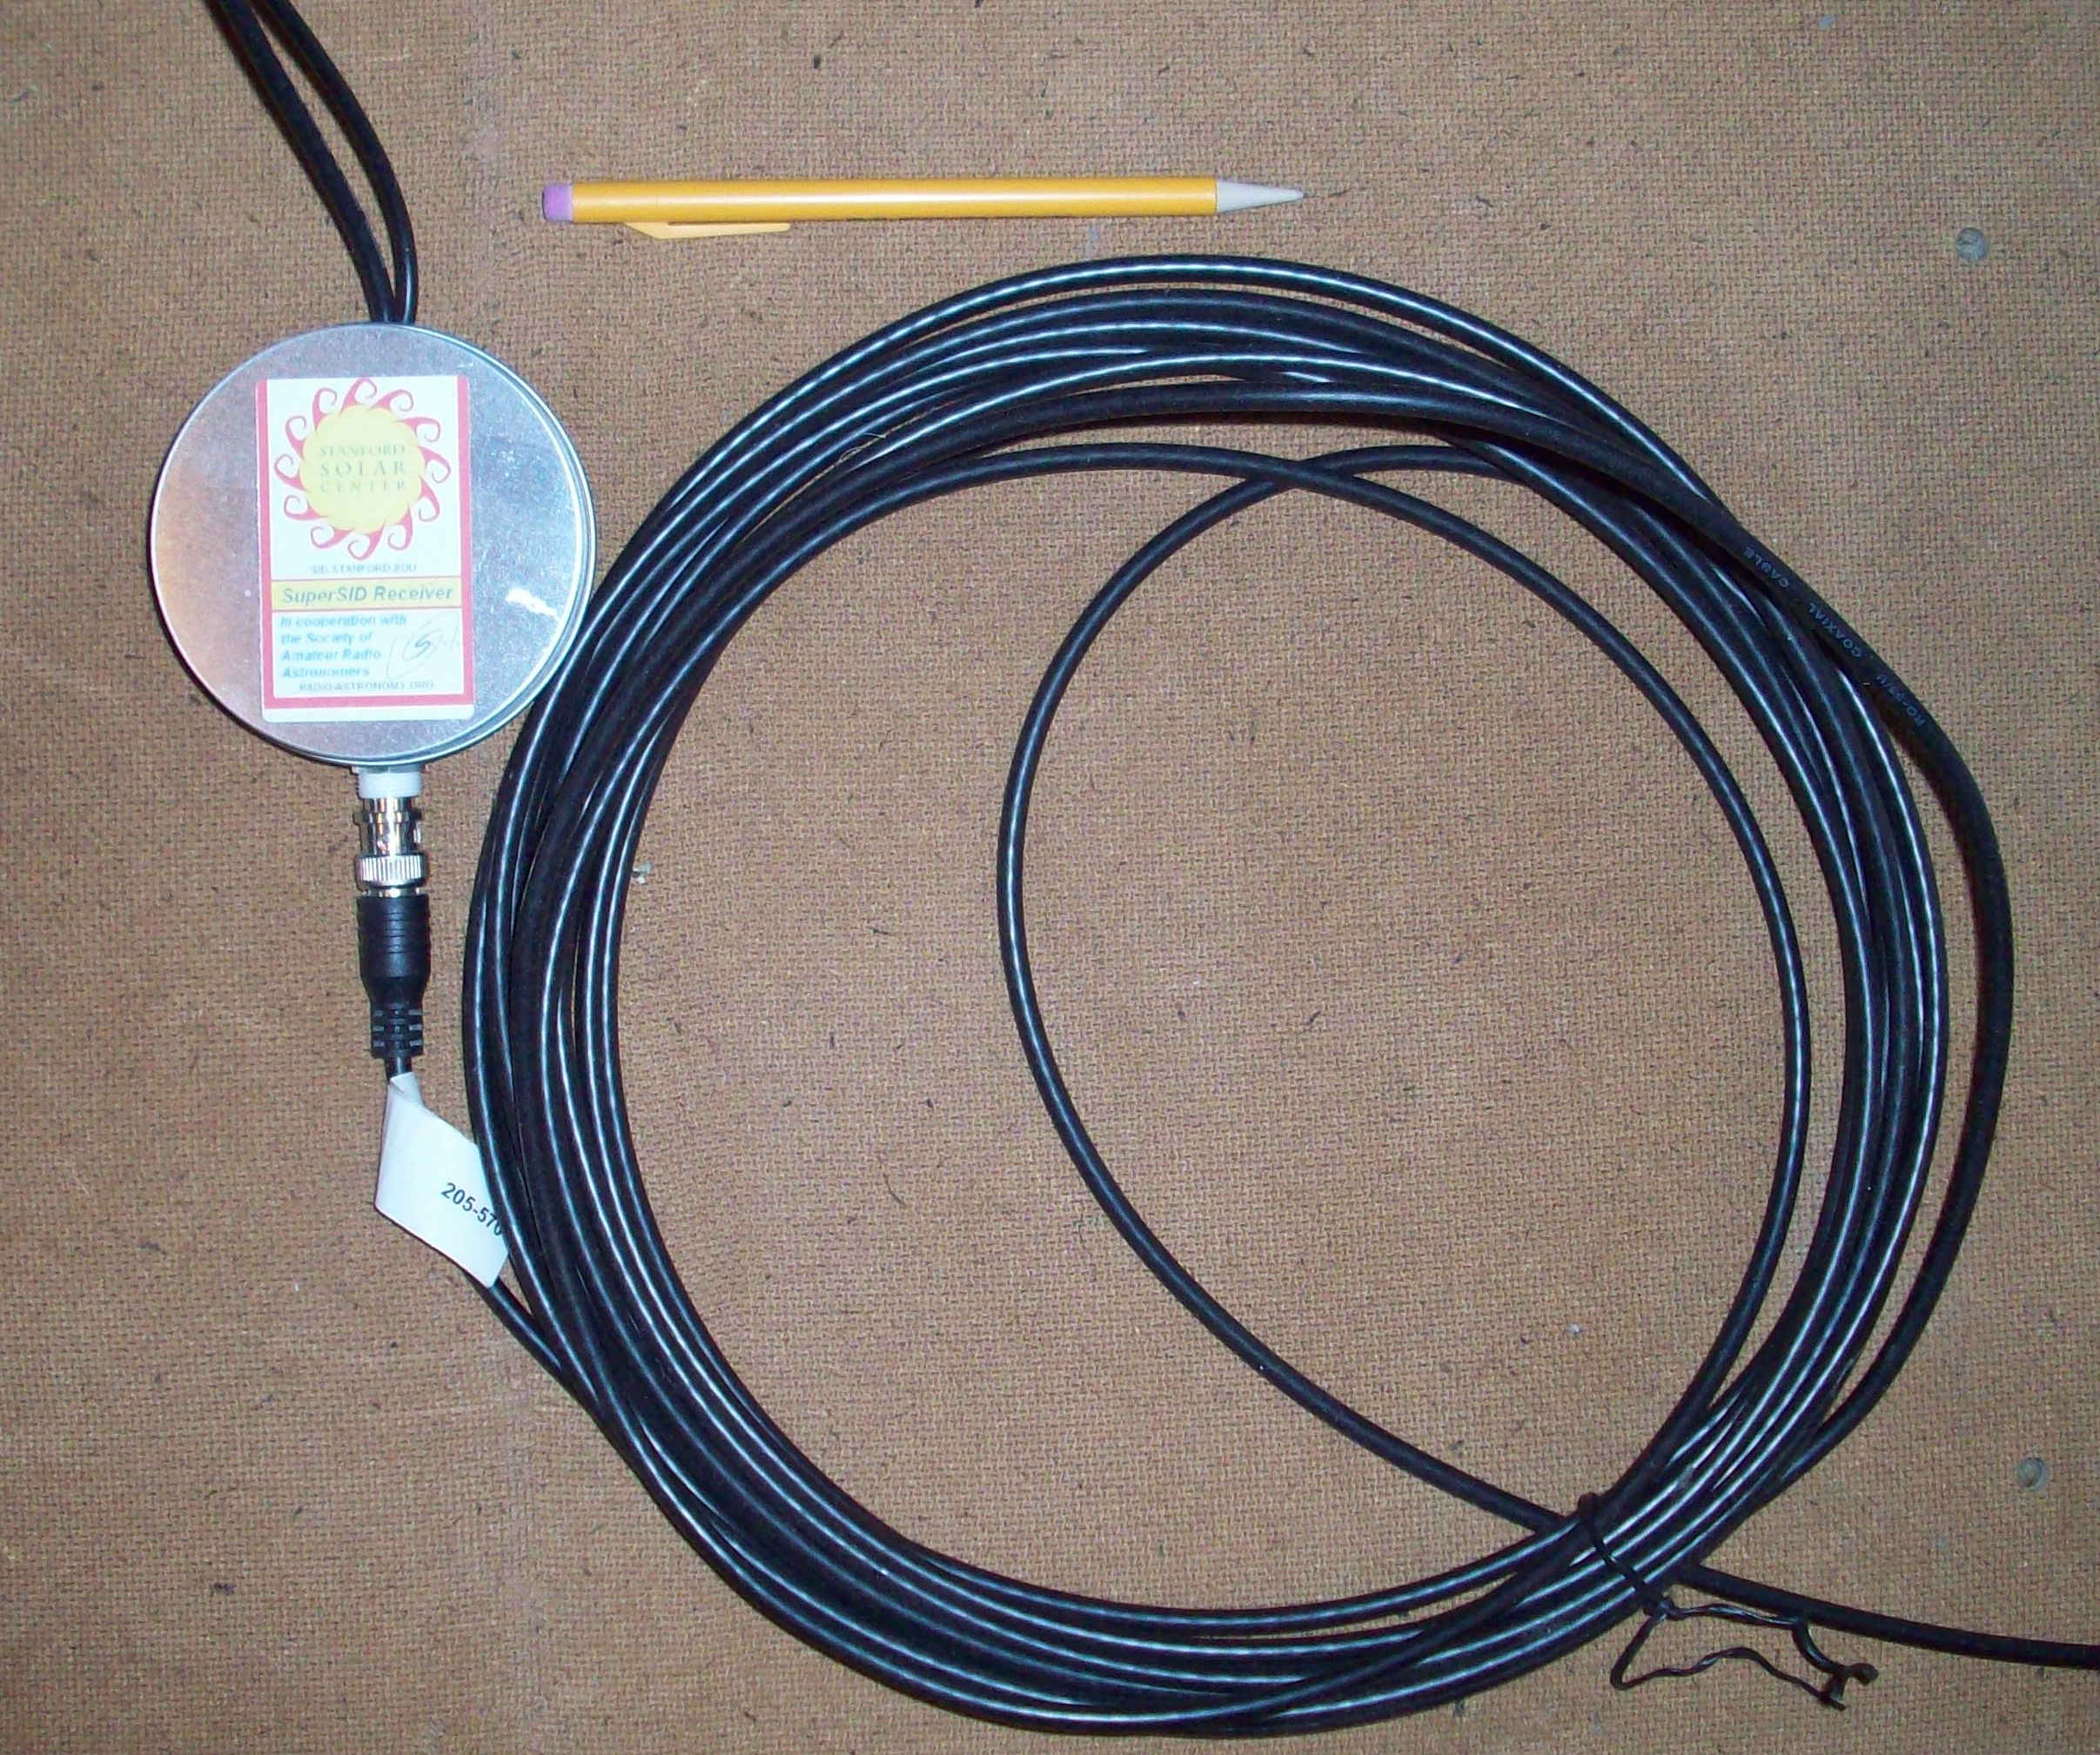
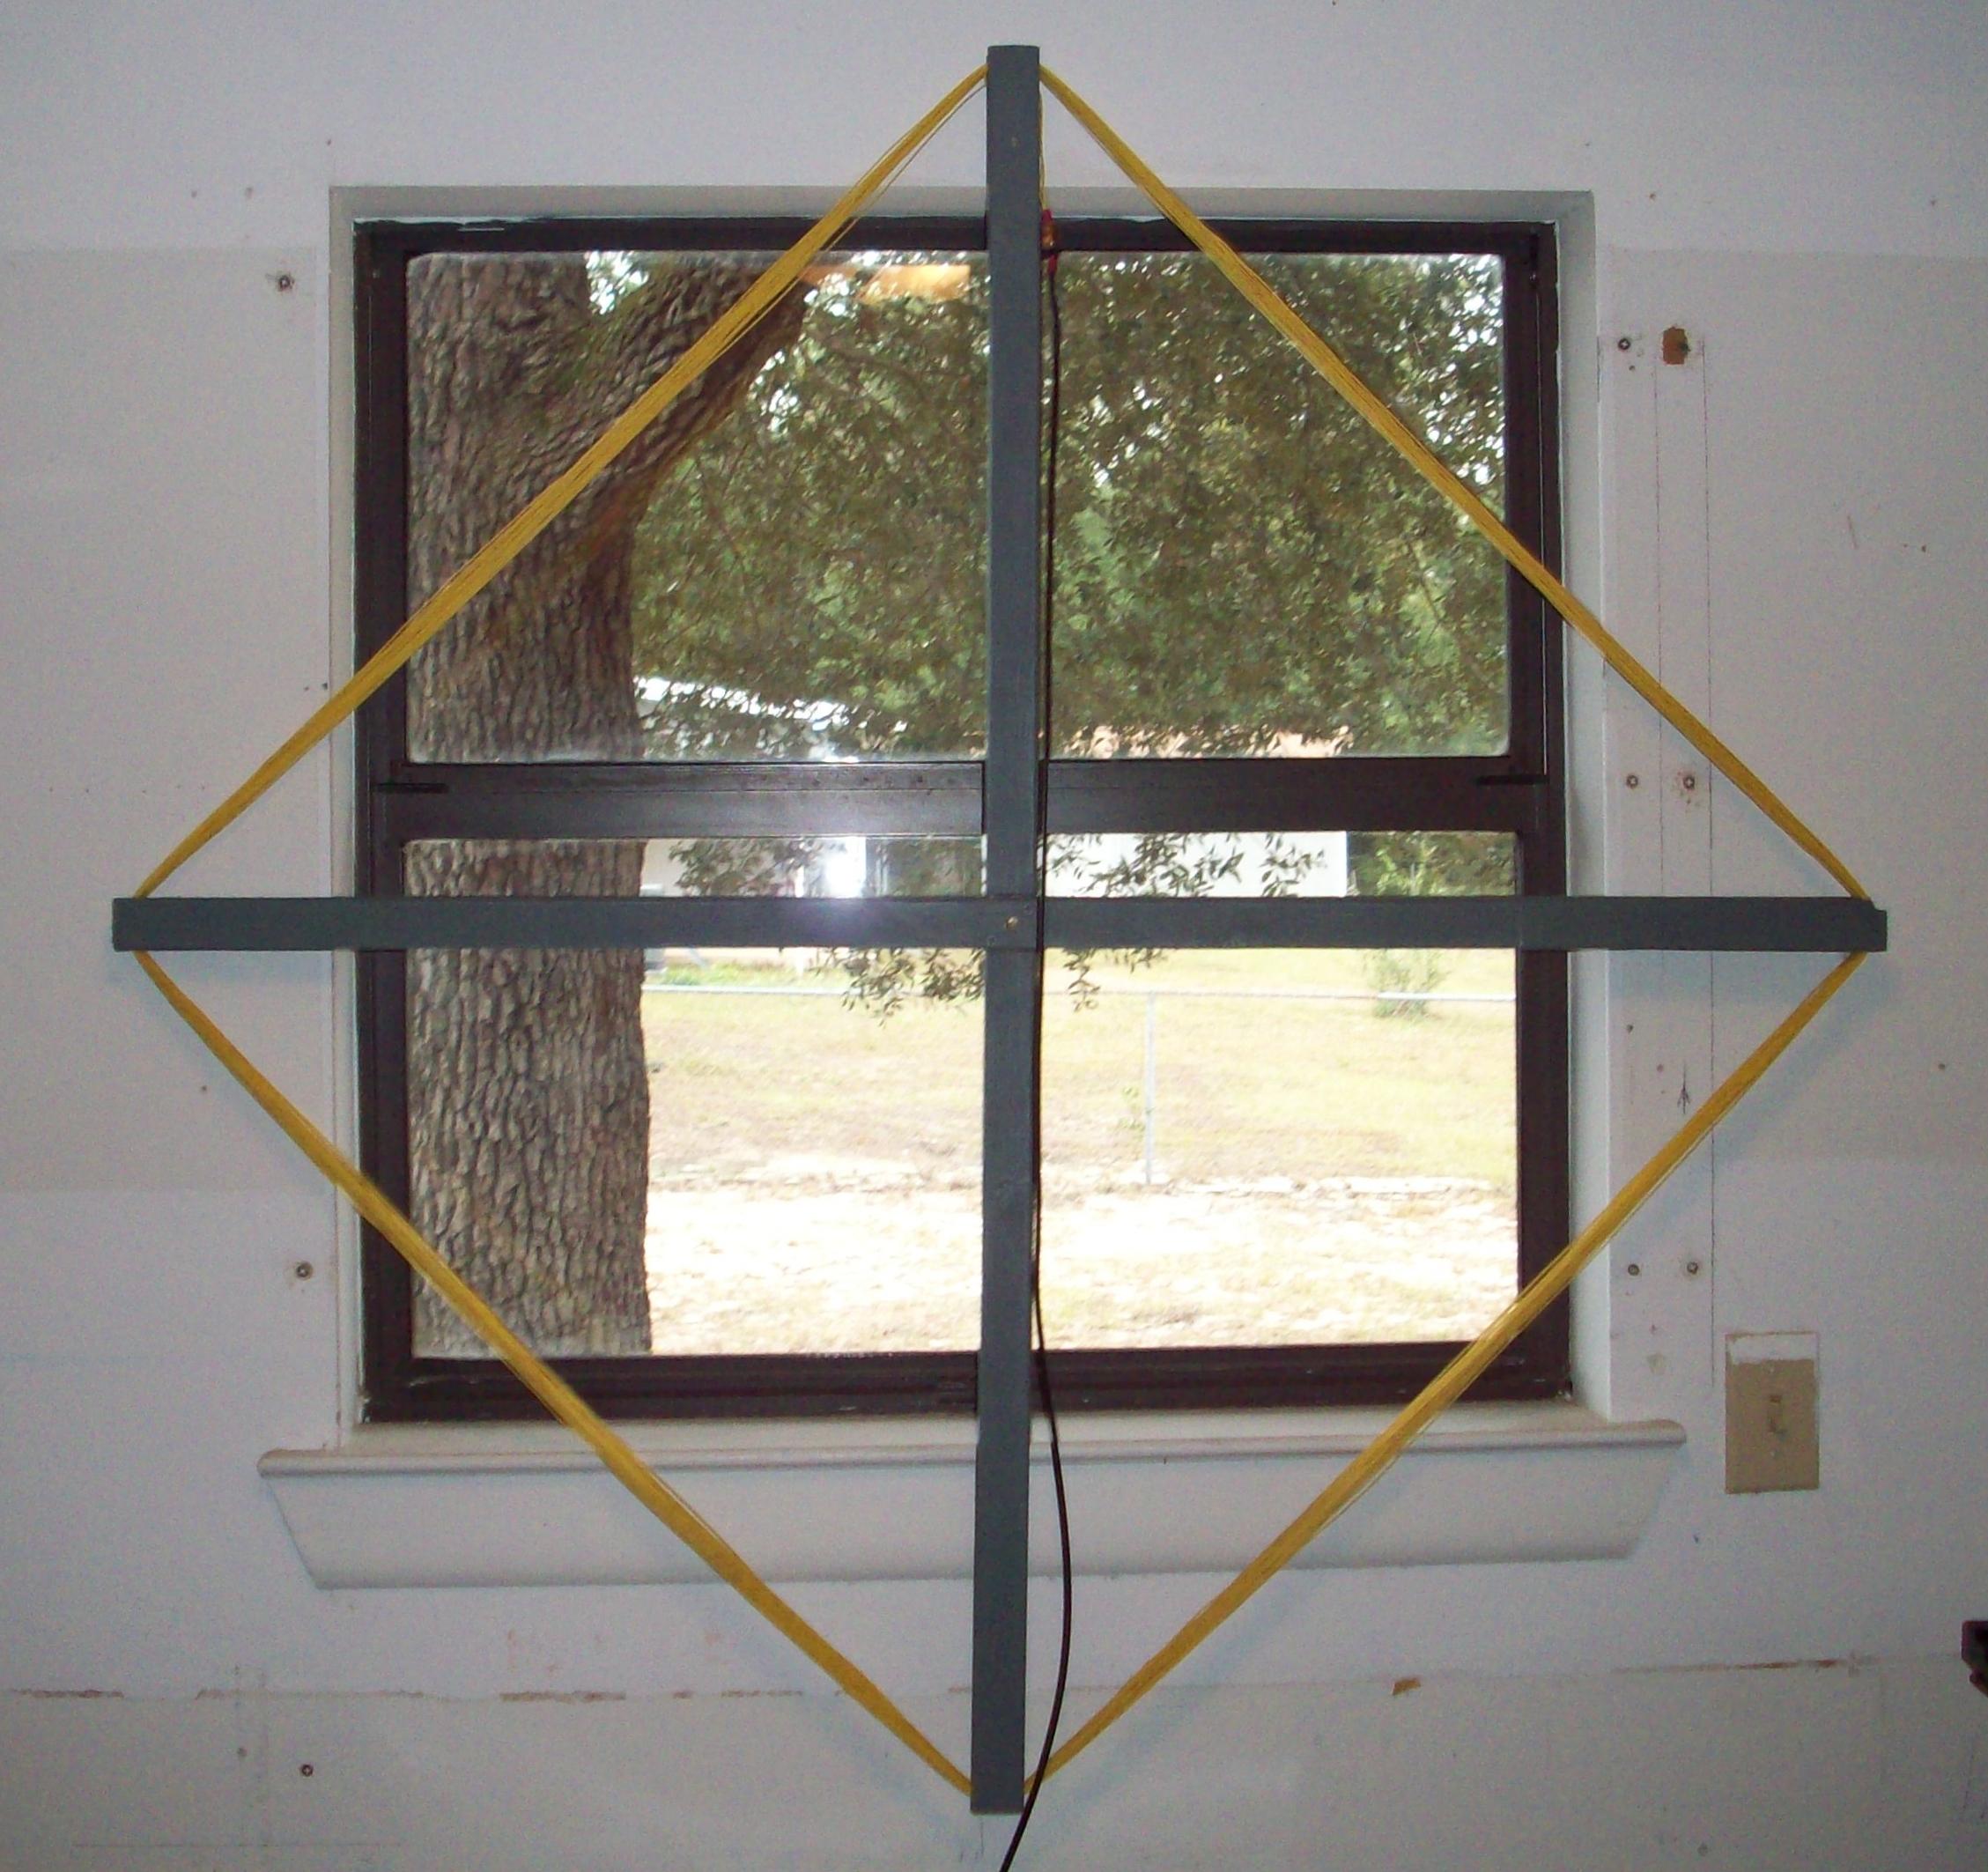
I’ve been looking to add radio astronomy capabilities to the PTO. As a first step out of the optical arena I have acquired a kit to assemble a radio receiver that monitors selected VLF radio frequencies. By monitoring received signal strength you can detect changes in Earth’s atmosphere due to the tremendous energy put out by solar flares. These atmospheric changes are known as SIDs (Sudden Ionospheric Disturbances).
The kit was designed by the Stanford Solar Center at Stanford University and supported and sold by the Society of Amateur Radio Astronomers (SARA). Although it is a kit, the only assembly necessary was to construct the structure to support the antenna and winding the antenna wire onto the support.
SID monitor receiver and cabling.
SID monitor antenna.
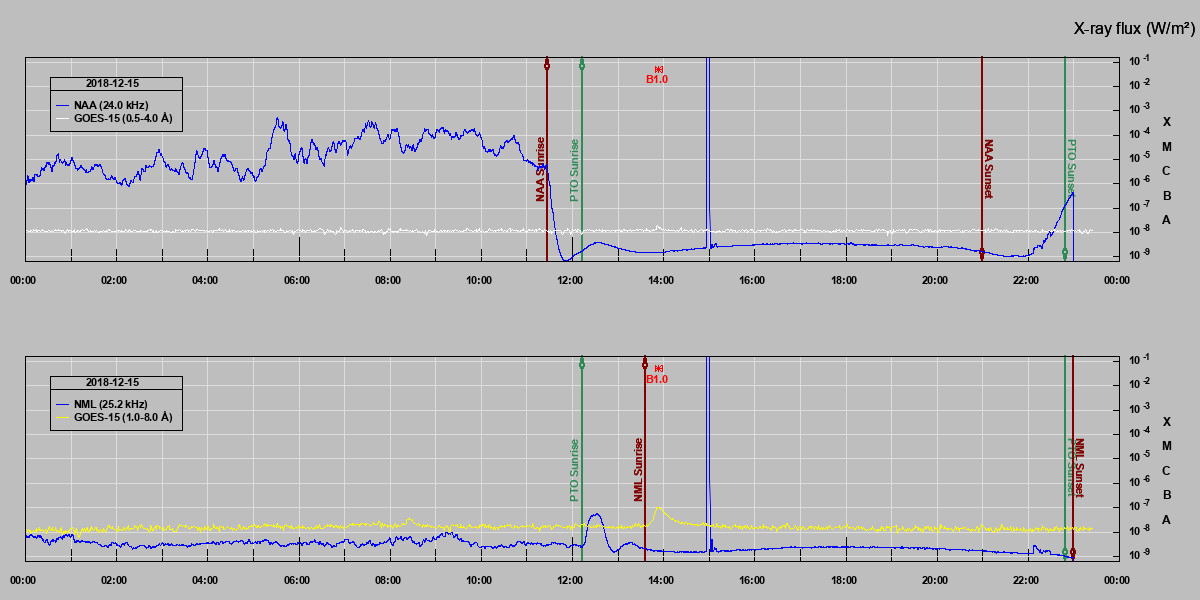
The signal measurements made by the monitor are saved and automatically sent daily to the Stanford Solar Center. The measurements will be sent monthly to the AAVSO manually. I have written software that combines the strength measurements, data downloaded from the GOES-15 weather satellite, and NASA solar flare event reports to generate the chart below. The daily chart is on the Observatory->Solar Conditions menu.
PTO solar conditions chart for Dec 15, 2018. Notice the class B1.0 flare indicated at about 1349(UTC).
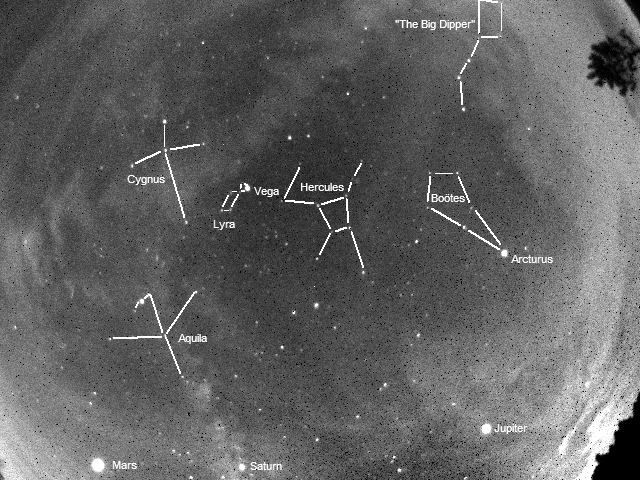
The 2018 Perseid meteor shower was the perfect opportunity to test my equipment and procedures for full sky imaging. I had previously set up the camera in my backyard but the trees severely limit my FOV and the light from the base keeps the sky pretty bright. The Munson observing site the EAAA shares with the NWFAA would have neither of those limitations and the addition of the meteors would provide a more accurate evaluation of the camera sensitivity.
I started the run at 2046 (L). I’ve annotated a copy of the first still image to show the 3 classical planets that were visible along the southern horizon. Venus had already set below the western tree line. The lens I currently use for the all sky view is designed for a 1/2″ sensor camera. My camera has only a 1/4″ sensor which is apparent by the cut-off Big Dipper. A sizeable portion of the sky is not visible due to the lens/sensor mismatch. North is at the top of each picture.
The evening started with some high clouds but ended up fairly clear. Along with several meteors there were a lot of aircraft. My personal meteor count was 69 but that included several meteors that were not Perseids. Meteors not aligned with any known shower are called sporadic meteors.
This is an assembly of 2,251 10 second images taken on the evening of the 12th of August and morning of the 13th. The images are played at 0.1 seconds per frame. A quicker video (0.03 sec/frame) is on the Facebook page.
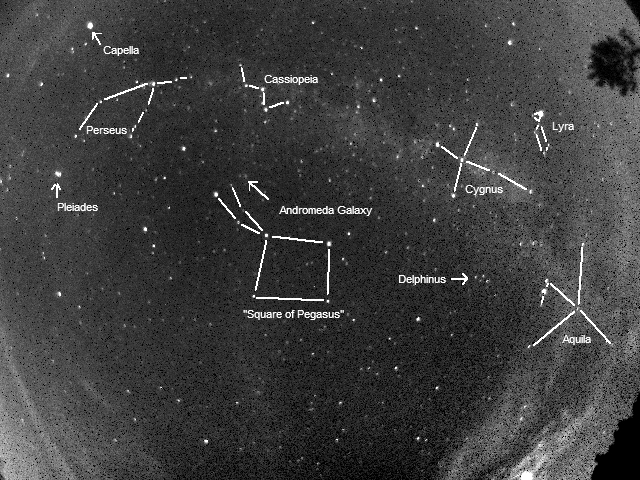
After several hours of Earth’s rotation, additional constellations and objects were visible. Of note is the constellation Perseus (the namesake of the meteor shower) and the Andromeda galaxy just visible as a smudge on the night sky. Although I have viewed the Andromeda galaxy naked eye before, Monday morning was the most prominent that I have ever seen due to Munson’s lower light pollution.
Lessons learned from this outing:
Extend exposure time to at least 20 seconds to increase the signal to noise ratio. That will also half the number of exposures I have to process.
Look for a 1/2″ sensor camera to avoid wasting FOV.
Look for a more sophisticated dark frame algorithm (note the peppered appearance of the clouds early in the video.
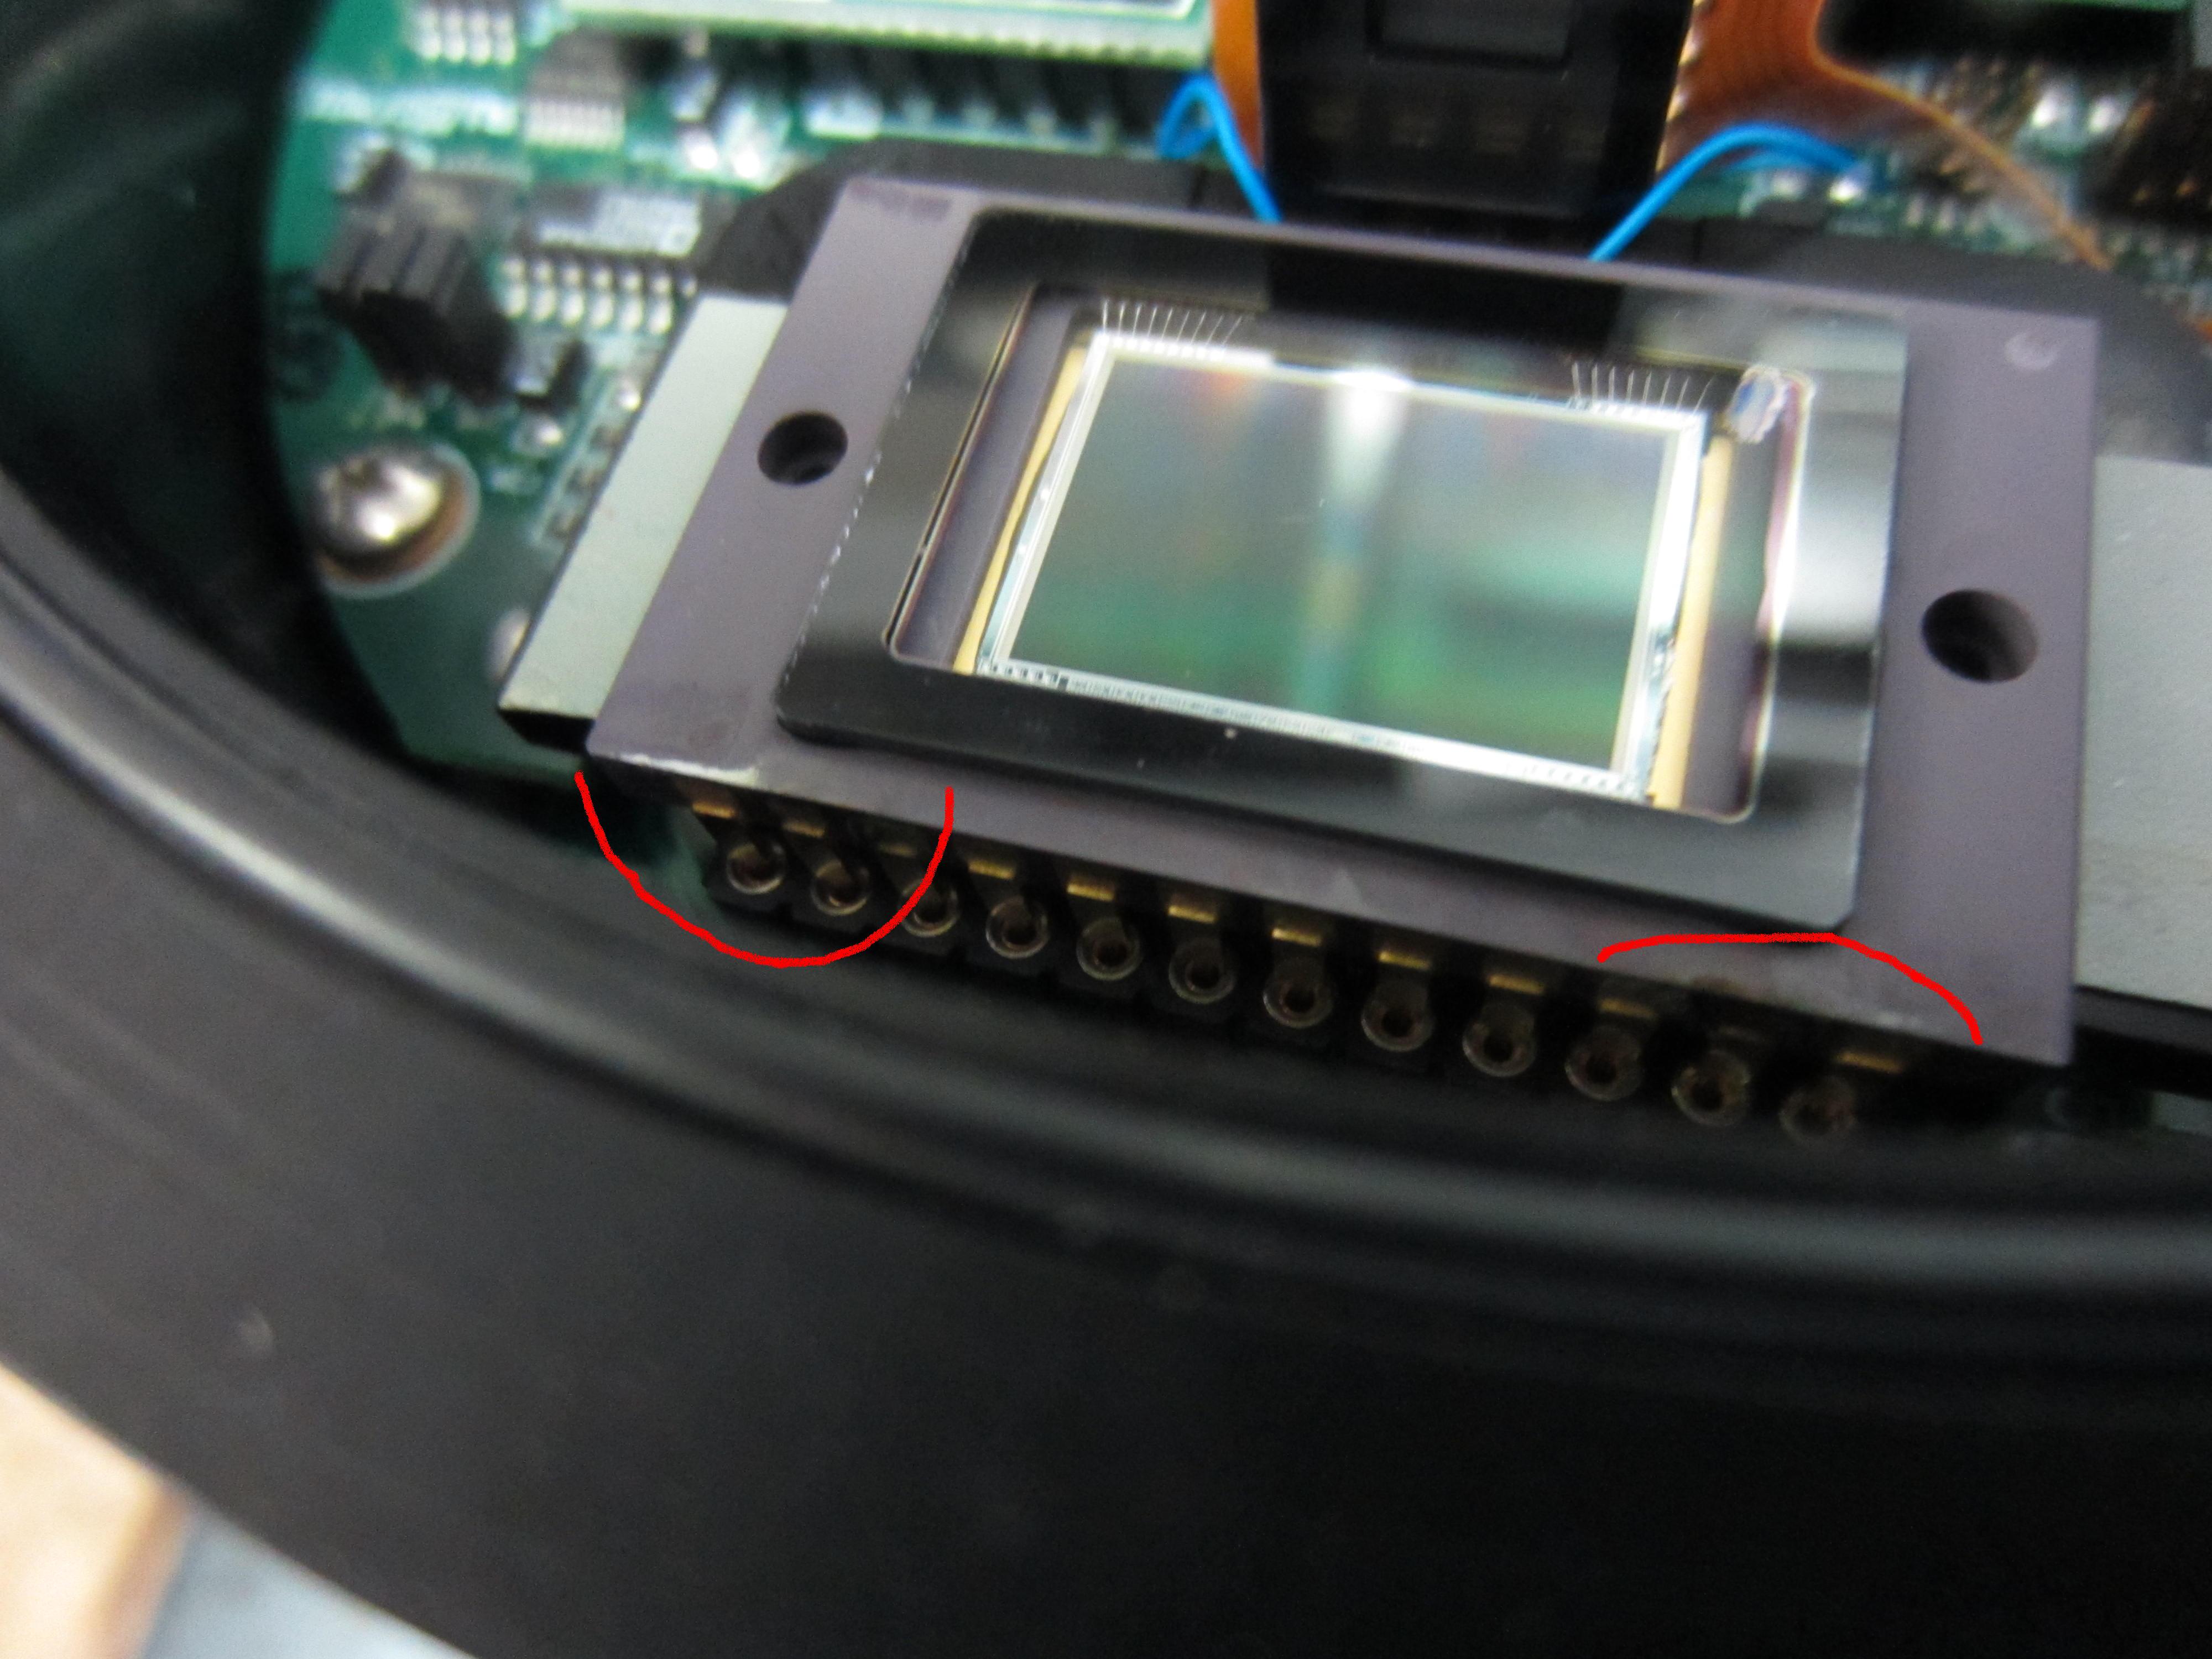
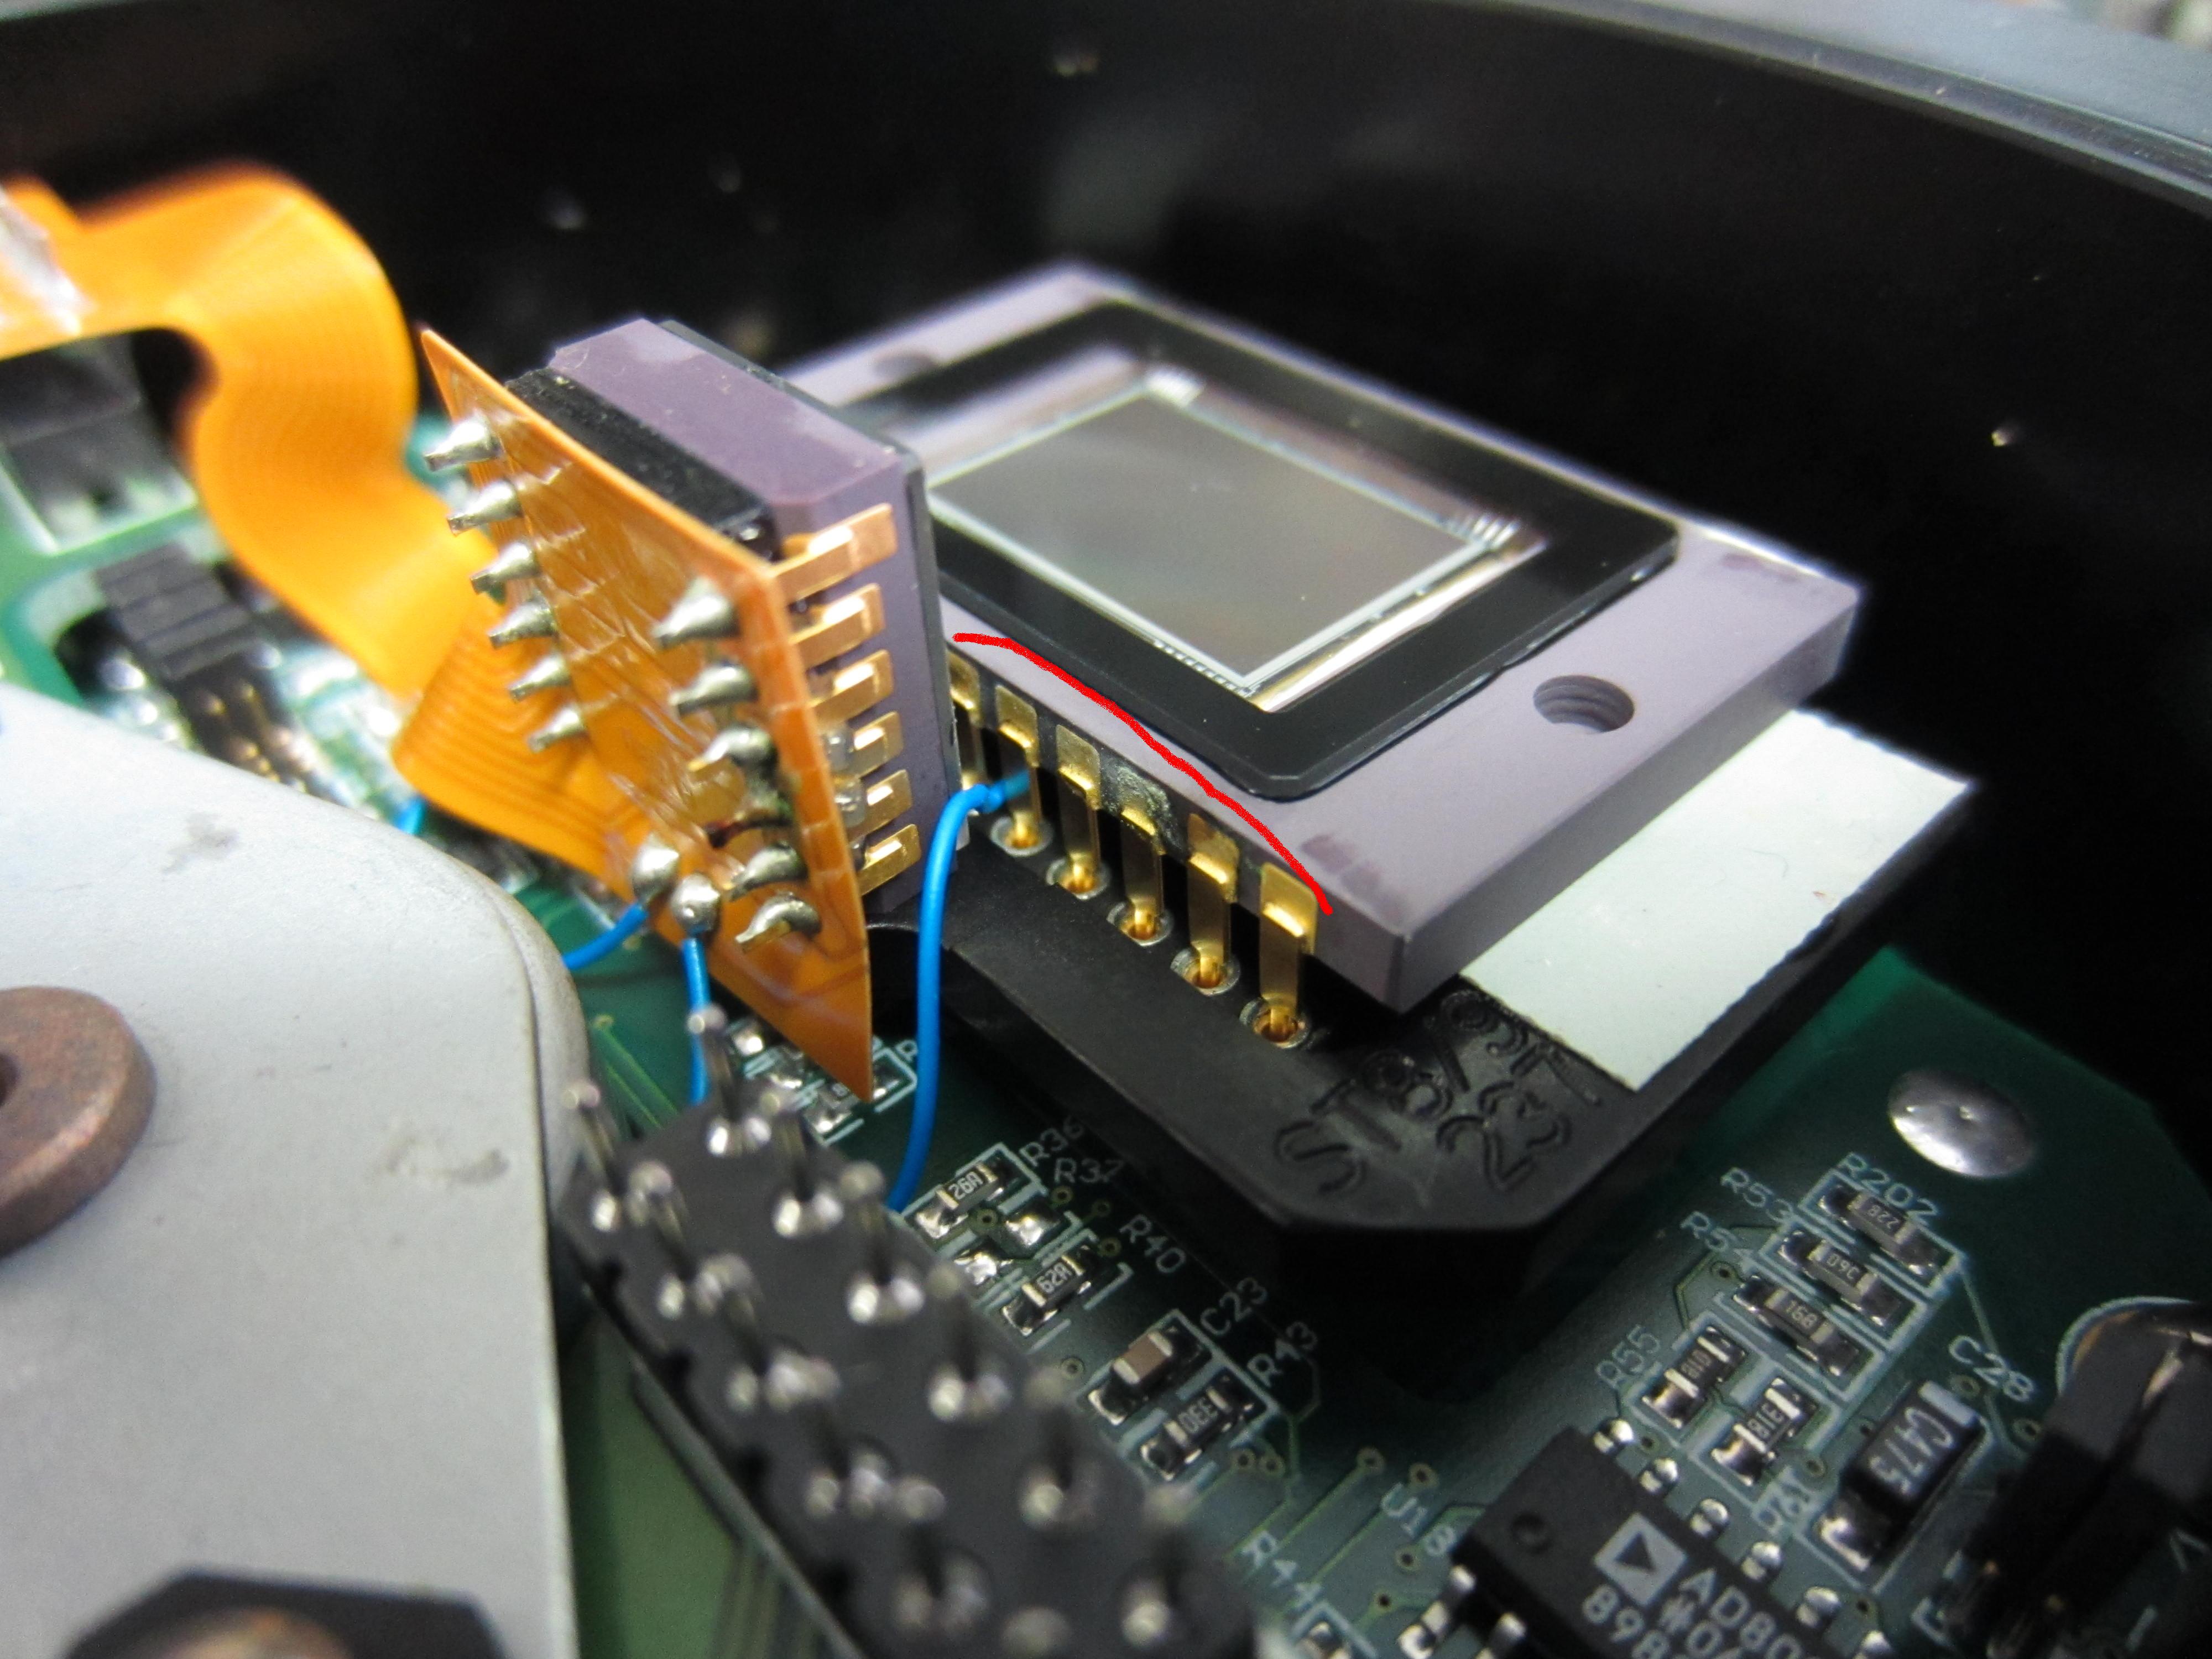
I just received a status update on my deep sky camera from the SBIG service center. The technician was able to duplicate the cooling system fan failure and has replaced it. He also discovered corrosion on some of the pins on the CCD chip. The guilty pins are indicated by the red lines in the pictures below.
The technician said that corrosion on the pins is the result of repeated cycles of moisture accumulating and drying out in that part of the camera. He will clean off the corrosion and has checked the camera’s seals for air tightness integrity and has sealed a couple spots of potential leaks. Hopefully, this is the source of the intermittent pattern seen in the images. A little bit of moisture shorting some of the signals together could cause the problem. Although I re-bake the camera’s desiccant on a regular basis, it looks like I will have to increase the number of times a year I head into the kitchen.